Friday, June 21, 2013

Horseradish crusted salmon with lemon tarragon butter

    Happy Friday! Today's food post is a horseradish and Panko crusted salmon. The horseradish gives such a nice flavor and the Panko has a really nice crunch. I topped this salmon with a lemon tarragon butter (which I have posted before and it is delicious!) both are very easy to make and turn out looking beautiful. This salmon goes really well with mashed sweet potato, I just sautéed green and cut up some carrot for this dinner because it felt lighter for the summer. 
    First I spead some Panko out on a plate and crush it up with the back of a spoon, this makes it finer and it sticks to the fish better. 
    Next I take the horseradish and put almost half the jar on a few pieces of papertowel. I want to squeeze all the juice out of the horseradish. Make sure not to get the creamy kind, it won't squeeze out the same. Squeeze it over a bowl or sink till it seems pretty dry. 
It will start to hold the imprint of your fist, then it's probably about ready. 
It should break up easily an mix right in with the Panko. 
When mixed it will be nice and fluffy, not wet at all. 
Now I pat a little coconut oil on my salmon and toss it in the horseradish mix. 
Now I heat a little coconut oil in a pan and put the salmon in
Now I can get it ready to plate and top with my butter. 

    Here's how I made the butter:
I take about a 1/4 of this butter at room temperature, it makes about 5 servings for the fish (you can always keep extra in the fridge, this butter is tasty on a lot of things)
Now I zest about 1/4 of my lemon and mince it up
Now I add that to my butter and I squeeze 1/2 of a lemon in the butter a well
Next I take a nice little bunch of tarragon and remove the leaves and chop it up, then toss it in. 
Mix it up well. The lemon juice won't all mix in but you will get some of it in there. 
You can too your fish with it room temp of throw it in the fridge to get more solid. 

    I have made these sides before in previous food Friday posts. Very simple greens sautéed with garlic. I switch up my greens all the time. Spinach, kale, chard, collards, they all work great. I like to use either coconut oil or bacon fat to sauté the greens, they both give nice flavor. Carrots I like to cook in the oven with a little oil and sea salt or kosher salt, 325 until they just start to get tender but are still crispy. They are great! 

    Here is my finished plate
The colors of the butter are beautiful, the lemon zest and tarragon really show nicely. It's always a beautiful plate with some oranges (sweet potato, carrot, butternut squash all go well) and greens!

    I hope you enjoy! Let me know what you think if you do try any of it :)

~ Janet ✌


Wednesday, June 19, 2013

Are your eggs fresh?

    I enjoy eggs so much, they are a very nutrient dense food and so versatile. We consume a good amount of eggs around here and we are lucky enough to have family that raise nice, well cared for chickens.  It's a good idea to try to get your eggs as fresh as possible and from a place you have seen. This way you know how these chickens are really living. The term "cage free" doesn't necessarily mean these chickens have space to roam around happily, wording on your eggs can be very tricky. It's not always possible to find a place to get your eggs other than the grocery store. In that case, you want to be sure you're not getting any old eggs. Here's how to tell if you've got fresh eggs. 
     Place your egg in a bowl of water, if the egg sinks to the bottom and lays on its side, it's very fresh. If your egg bobs around on the bottom, it's a week or so old. If your egg sits on its tip, it's a few weeks old. Finally, if your egg floats, toss it!!! You've got a bad egg! 
     If you crack your egg, a fresh egg will have a nice round yolk with the white surrounding it an looking nice and think. If the white is loose and runny, like water and the yolk is flat, toss it, you've got a bad egg! 
    Eggs are full of protein and low in calories. They contain antioxidants as well as vitamins B2 and B12. They are rich in minerals too, they contain selenium, molybdenum and iodine. Eggs are so easy to prepare and can be made in so many different, wonderful ways. Do you start your day off with an egg? 

~ Janet ✌

Tuesday, June 18, 2013

How I cure our onions.

    I use an onion a day around here (at least) they are one of my favorite things to cook with, they are delicious raw or cooked and add flavor to so many meals. The health benefits of onions are astounding! With all that said, of course they are one of my favorite things to grow :). They are pretty easy to grow, you give them a little care and a couple months later, they give you a nice bunch of fresh onions to prepare for storage. We just harvested (mid June) an we will have these onions through December, even through February if cured and stored correctly. I buy about 5-6 onions a week so, that saves me a lot at the store for the next few months! 

    I know my onions are ready to harvest when half of them fall over, at this point I want to take the entire crop out. Your onions are very delicate and will bruise easily of you don't handle them properly. I like to take my small hand shovel, gently push it down in the soil, staying far away from where the bulb itself is. I slide the shovel under the onion a bit a push up gently. The onion will pop up an the soil around it will loosen, making it very easy to pull free without any harm. Now grab your onion out, lightly flick off any big clumps of soil and continue on with the rest. Don't scrap off the soil or anything, leave on what doesn't fall off. 

    Take your onions to a place outdoors that will keep them safe from the rain and sun. Keep them in this warm shady area for a few days. After a few days you can clean off a bit more of that soil. During This cleaning i like to trim the tops to about 12 inches and take off anything rotten or brown. Keep them in the warm shady spot for another 2 weeks. The curing process will take about a month total, during this time the layers of outer scale are going to seal together to close up the neck. 

    After those 2 weeks are up I fully manicure. Clip the tops to about 2 inches and trim the roots off. Take a damp cloth and wipe them down to get the dirt off. Bring them indoors and place in a single layer someplace they can continue to dry for another 2 weeks. 

    Now you've got fully cured onions! Trim off the rest of their tops and take them to a cool, dark place to store for future use. It's that easy, just a few steps and a little patience will give you a fabulous return. Your homegrown organic onions will not be giants like the ones at the store, they will be much smaller and generally more flavorful. Remember, the smaller the onion, the better. They are more nutrient dense when they are smaller and you are more likely to use the entire onion rather than only using half and having to toss the rest. Always use your entire onion or throw away the left over, they suck up bacteria and can get you pretty sick if you eat it (especially raw) after being cut and stored. Here's our first harvest this year, 100 onions:


I will post pictures after I manicure them for the first time. Then follow up with fully manicured onions that are ready for storage! 

~ Janet ✌


Thursday, June 13, 2013

Our NON GMO project gift box!

    Back in April the people at nongmoproject.org had a contest. You had to submit a picture with a sign telling what you were doing to stay GMO free. We entered a photo and recently found out that our photo was one of the winners! The prize was a box of goodies that are all GMO free! We were so excited to see what was in our box and today, it's here!!! So let's check it out :)
Very nice little note included:
Big, heavy box. As you see, UPS was very serious about the fragile label :-/
Inside is a nice, large reusable bag with a list of GMO free brands. We should all be supporting these brands.  
I can already see some of the goodies. This bag is stuffed full!
Here is a picture of everything that was inside! Fruit spread, pretzels, chocolate bars, cookies, granola bars, brownie mix, olives, coconut milk, jelly beans, B vitamins, plant sourced minerals and Andalou skin products! Amazing!

     This contest was so much fun, my girls had fun making up what to do for the picture and they learned a lot while discussing the idea behind the contest. They are bursting with excitement after opening this package today! Almost everything is gluten free and of course, ALL GMO free!!! If you've never been to their site, check it out!! Nongmoproject.org and 'like' them on facebook Non-GMO project. Remember to know the brands you're buying from, support the brands that want us to have the right to know if we are eating GMOs. Thank you so much to everyone at nongmoproject.org, what an amazing gift and what an amazing thing they are doing over there by working so hard to get the word out on GMOs. 

    Here's our winning photo :)
http://www.nongmoproject.org/take-action/nongmochallenge/non-gmo-challenge-winners/     

~ Janet


Calendula oil for wounds, better than neosporin.


    Neosporin is kind of like a childhood memory for me. I'd fall off my bike, scrape my knees and elbows and go slather on a nice layer of Neosporin. When I started becoming more aware of what I was putting on my skin, Neosporin was one of the things I took out of my medicine cabinet. The ingredients were foreign enough that I knew I could get something more simple and natural. Here are the ingredients in Neosporin:
        Active- bacitracin, neomycin, polymycin B
        Inactive- cocoa butter, cottonseed oil, sodium pyruvate, vitamin E, white petrolatum 

   I found calendula oil as a great, natural replacement for cuts, scrapes and burns. Calendula is often called "pot marigolds" but are different from the marigolds we think of. Calendula is in the family of daisies and chrysanthemums. They have beautiful flowers and are pretty easy to grow! Calendula oil is said to, reduce swelling, help with wound/burn healing, acne, eczema, diaper rash, bruises, and sunburn....just to name a few :). Whenever one of my children has a scrape of any kind, I dab the oil on with a q-tip and cover it if needed. The oil seems to soothe their scrapes very quickly. 

    We also used to use peroxide, however some studies have said that peroxide can damage the tissue around your wound. You're better off cleaning with soap and water or a little squirt of saline solution than using peroxide. Their are mixed studies about the foaming of peroxide actually even killing bacteria, not sure the deal about that but I have stopped using it because I don't want to damage healthy tissue.  

    You can get a small bottle of calendula oil that fits perfectly in your purse or in the car, right with a box of bandages :).
It's always a part of my "mommy bag". 

~ Janet ✌

Wednesday, June 12, 2013

Benefits of composting and an easy, inexpensive way to make yourself acompost bin!

    People sometimes refer to compost as "black gold", this is because compost is worth so much to anyone with a garden. It saves you money and also offers more benefits to your garden than commercial fertilizers. There's a very rewarding feeling from compost, you've taken your "trash" and turned it in to this dark, fluffy beautiful soil, you can tell by looking at it that it's going to be good for your plants! Compost releases its nutrients slowly, unlike store bought fertilizers that can release everything so fast and then be void of anything great. Compost helps sandy soil hold water better and nutrients. It will help loosen clay/silt soil for better air and water flow. 

    There's a common misconception that compost bins smell, well, they don't! We have a tiny little yard and right as you walk into it, the compost is to you're left and you'd never have a clue. If you put the wrong things in your compost bin, you might have a foul smell but not if you compost correctly. Here are some things that you should put in:
        •fruit and veggie scraps
        •egg shells
        •coffee grinds and filters
        •grass cuttings, leaves, weeds (avoid putting any diseased plants in)
        •newspaper, brown paper bags
        •wood ash
Here are a few you shouldn't put in:
        •meat/bones
        •dog/cat feces
        •diseased plants
        •dairy products

    You end up saving a lot by recycling these scraps rather than bagging them up and sending them to the landfill. You can use the compost for your vegetable garden, flower garden and grass. 

    Your organic matter will break down as you pile it up in your bin. As it decomposes the bottom will become a very rich, nutrient rich soil. You will know your compost is ready it's dark brown, soft, fluffy and crumbly with an earthy smell and no sign of the scraps you put in. If you see big chucks of oranges and stuff, it's not broken down enough. If your compost is ready, it's best to let it set out for a week or two to be sure it's stabilized. 

    If you have looked at compost bins, you probably know that they can be kind of expensive. Consider making one on your own for about $15! It takes about 10 minutes to do. Here is our process... 

Old trash can (if you have to buy a new one for this, you're only looking at about $15. If you have an old one, its free!)
1 1/4 inch hole saw is what we use to get our circulation/drain holes for the bin
Start by drilling 6 holes around the top of the can. 
Then start your rows on the side. 
We stagger them about 6-8 inches apart
Now you'll need your saw. Sawzall works great.  
Drill a circle opening in the bottom of the can. Leave a lip around it. 
Here is your finished bin. No need for a lid really but if you feel you want it covered, the original lid would cover it over just fine. We never have a lid on ours and its no problem. When we are ready to check if we've got usable compost, we tilt the can a bit and grab some out. If it looks ready we tilt it and shovel what we need. 

    We started out with an expensive bin that broke after a few years, it's little door to get the compost from was broken within months of purchase! We have used the same trash can compost bin for several years now and it's in fantastic condition still! So save some money and try this out. 

~ Janet ✌


Tuesday, June 11, 2013

Keep your garden safe from slugs

    This year I am having a problem with slugs! They are eating my baby squash plants, each time one pops up, it's soon gone. After losing 5 plants, I am fed up and trying everything I know to keep them from eating my new squash. I thought I'd share with you, in case you find your plants being attacked by slimy slugs. 
    I saved up some egg shells, cleaned them off and then crushed them up. 
I took this out to the garden and spread it in a circle around my squash plant (it's just coming out of the ground, if I don't keep them away tonight, my plant will be gone tomorrow)
This is also good for the soil because it provides calcium as the shell decomposes. So added benefit! The slugs won't be comfortable crossing the rough, sharp eggshell because it will hurt their belly. 

    I also sprinkled diatomaceous earth around all my plants. This is great because it also keeps other insect pests away. Again, the slug does not want to skim its belly across the diatomaceous earth just like the egg shell. If you don't have this handy you can put down some sand paper, they don't like that either and it won't harm your garden. 

    Tonight I will put out a bowl of beer. The slugs will love it and they will be there in the morning for you to dispose of. I'll ask my husband to take care of that task :)

    Another thing you can do is invest in copper wire it tubing. This reacts to the slime they produce and basically shocks them. I don't have any copper wire around right now so that's not an option for me but it works really well if you've got some!

    The last thing that will deter slugs are plants that do not like. Just plant some rosemary, anise or fennel around the plants you're having problems with. That should help keep them away. Slugs are really attracted to pepper plants and squash, if you see holes in the leaves of your plants, you might want to try a few of these ideas. If you have any ideas for me, I will be sure to give them a try and post about it! I am trying to save my squash, I will update later to say if I've had success or not. Wish me luck :D

~ Janet ✌


What you can do with baking soda

    I have a few things that I couldn't live without, one of them is baking soda! I use it every single day, in the kitchen, bathroom, on the carpets, in my hair, bug bites it seems I'm always saying "let me get the baking soda". My children even ask for it all the time! Here are a few ways I love to use it....
 
   For beauty/personal care:
Use it as a mouthwash. Mix 1 tsp baking soda with about 4 oz water. Swish around, spit then rinse. 

Make a facial. Mix 3 parts baking soda with 1 part water (or coconut oil) to make a paste. Rub this in circular motions all over your face and neck. It will leave your skin soft and fresh. 

Use it as a natural deodorant and get rid of the chemical stuff. Just run some right under your arms and it will balance your ph and deodorize!

Make a bath soak and soften your skin! Just add 1/2 cup of baking soda to your bath water, you will feel a difference in your skin when you get out. 

Foot bath. Add some baking soda to a bucket of water to create a soothing foot bath. It will deodorize your feet and leave them feeling soft. You can also make a paste to scrub the dead skin from your feet, works like a charm. Make it as you would for the facial, if you use coconut oil, you will have some wonderfully soft feet :)

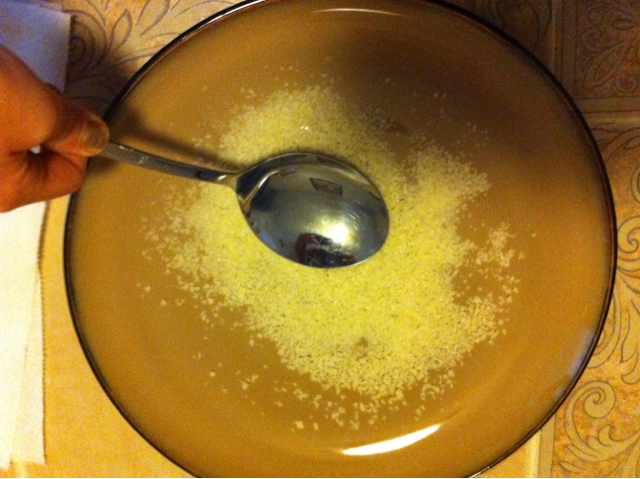
Make it your shampoo! Ditch the shampoo with all the ingredients you can't pronounce, this stuff has made my hair look and feel better than ever. I mix about 1/2 cup baking soda with 3 cups water and put in a squirt bottle. The baking soda removes all the yucky residue build up in your hair. I follow up with a rinse of apple cider vinegar (I will post about that later) 

Make an antacid. This balances the ph in your body so it's very helpful mixed with water to settle a sour stomach. 

Help with insect bites. This is my go to for itchy red insect bites. I make a little paste and dap it on the bite with a q tip. You'll be amazed how much this can help! 

    Around the house:
Deodorize all over the house! Sprinkle on the carpets, let it sit for 15 minutes to soak up odors and then vacuum. I make a nice little mix of baking soda, nutmeg and cinnamon and toss it on the carpets! Smells great and after you vacuum it up, the vacuum seems pretty good too :)

Sprinkle in trash cans, garbage disposals, shoes. Keep it in the fridge and it will deodorize all of these things! 

Scrub your pots and pans, sinks, toilets, oven, counters, bathtub, floors. You can add it to your dish soap to give it a little boost. Either make a paste or sprinkle it right in your counter tops, in your toilet, bathtub etc and just scrub with a sponge. Rinse well and it will have everything sparkling. 

Unclog your drains. If you have a drain that seems to be clogged up just sprinkle about 1/2 cup baking soda then add 1/2 cup vinegar, let it bubble and drain, wait 20 min and pour boiling water down. It works amazing to clear up a clog. 

Boost your laundry detergents cleaning power! Add 1/2 cup baking soda to your wash and you will see fresher laundry. 

Suck up an oil stain. I have used it on oil on clothes and floors. Just add a little pile right in top of the oil and let it sit. You may have to apply more than once but this will soak up oil very well. I have saved many articles of clothing this way. 

Soak your cloths diapers. Mix 1/2 cup baking soda to a small bucket of water and let your diapers soak, it will take away those gross smells very quickly. 

Fire extinguisher. If you find yourself with a little kitchen fire, toss some baking soda over it to get it out. Also good to bring some camping to throw on the fire if you need to. 

    Fun with the kiddies:
Last but no least on my list is making good fun experiments with the kids! Add some baking soda and vinegar to make an exploding volcano. 

Make a balloon blow up itself with baking soda and vinegar. 

Explode a ziplock bag by mixing baking soda and vinegar, this is a favorite aroun here :)

I'm sure I haven't even covered the many ways I use baking soda, it's just got endless possibilities. Please share some ways you use it around your house. It will save our environment a lot of bad chemicals if more people start to use it around the home, it will also save you from lots of chemicals in your body if you try it as a deodorant or shampoo. Not to mention how much money it can save you! Who doesn't like to save money?!? So try it out and tell me what you think! Here is the brand I use:


~ Janet ✌


Monday, June 10, 2013

Chia seeds, a versatile superfood!

Pour on the chia seeds!!!!

    Chia seeds are wonderful! They are easy to throw right on a salad or in a smoothie and they are an amazing superfood. Chia seeds are native to South America, they are well known from "chia pets" that are sold in stores. They can be ground up or just eaten whole (unlike flaxseeds that must be ground for you to get the nutrients from them) they are also great in drinks! 
    Chia seeds contain so much in a tiny little seed. They are a rich source of ALA omega 3 fatty acids, contain fiber, protein, potassium, antioxidants, magnesium, calcium and iron! They are gluten free as well :). In a serving of 2 tablespoons you get:
    10 grams of fiber
    18% DRI calcium
    35% DRI phosphorus 
    24% DRI magnesium
    50% DRI manganese

    They are almost flavorless so they can really be thrown in to so many things without changing the taste. We enjoy them the most with our yogurt, smoothies, oatmeal or in a salad. You can easily sprout them and add the sprouts to your salad or sandwich. Did you know they can be used as an egg replacement too???? Try this, 1 tbs chia seeds mixed with 3 tbs water, mix and let it sit for about 15-20 minutes. Then just add to your recipe that calls for egg!
    Do you have any special ways to use chia seeds? I enjoy them in kombucha but I'm alone on that one in my family, no one else likes the texture. 

~ Janet ✌

Thursday, June 6, 2013

Get to know your soil

    There are many tricks and tips in gardening. Each plant likes/needs something different, some thrive in full sun, some in shade. You've got your plants that are good companions and ones that do not enjoy growing near each other. The soils ph is also very important. So how can you tell if your soil is good and ready for planting? Here are some things to take a look at. 
    What's your worm population? Worms are very beneficial to your soil, they work their way through your soil ingesting sand, silt, clay, and organic matter and they turn it all into nutrient rich castings. The castings break up the soil, making it better for air and water drainage. If you take a look at your soil to see how many worms you've got, you can get an idea of the quality of your soil. Worms are obviously going to be found in higher number in soil that contains enough organic matter for them to eat. Here's how to "count" your worms. 
•grab a shovel and dig up a square of soil about 1ft x 1ft and 7 in deep. 
•spread your soil out in a spot that you are able to see the contents and break up the chucks. 
•sort through the soil and gather your worms. 
If you have fewer than 10 worms, your soil is not ideal, you need to work your soil and add compost and mulch. The higher your worm count, the better, you can never really have too many worms!
   Now here's another thing to check,  Acidic or alkaline??? You can buy kits to test your soils ph and then you can adjust it from there. You can also check to see if its acidic or alkaline with two things you have in the kitchen, vinegar and baking soda (the uses for both are endless, I will talk about that in a later post). To do this you will:
•Take dirt sample, mix with  distilled water to form mud.
• Pour some vinegar over top. If fizzes its alkaline
•Mix another sample of dirt and distilled water to form mud. 
•sprinkle with baking soda.  If it fizzes its acidic. 
•If neither produces fizz its pretty alkaline soil

    You will need to look specifically at what each plant needs, in order to make the soil just right. If you keep the soil to their desired consistency and ph, they should reward you with a lot of beautiful things. I always love to hear your garden tips so please share them here! 

~ Janet ✌
     

Tuesday, June 4, 2013

How to treat your sunburn


    Summer is great, so many things coming to life around you. The days are longer and the sun is stronger! That means sometimes you get a little burn.  It's best to treat your burn so you can try to stay comfortable and heal so you can your damaged skin.
    Here are a few things I think can help a lot with sunburn:
    •make an oatmeal bath. I blend up some oatmeal into a flour, fill a tub with tepid water. Add a cup of oatmeal and soak in it for a while. This will help with the itch and dryness of your burn. 
    •make an aloe and lavender oil blend. Take a whole leaf from and aloe plant, dig out the meat, add two drops of lavender oil to it and mix. Apply this to your burn. It will help with pain and inflammation and speed up the recovery process. You can repeat this a few times a day. 
    •dip a cotton ball in witch hazel and apply it to the burn. This also helps with inflammation. 
    •apply unsweetened plain yogurt to your burn, leave it on for a few minutes then rinse of in a cool shower. This feels amazing! 
    •make a tea soak! Brew a strong, large batch of tea (green works best) let it cool, dip a towel in the tea once it's cool and apply the towel to your burn. You can also make a bath with your tea if you have a large area that was burnt. The tannic acid in the tea helps with the pain if sunburn. 
    •put your coconut oil in the refrigerator and run it all over your burn. The coconut oil will help your burn from drying out and itching and it will feel amazing when it's chilled before you apply.
    •obviously keep hydrated, drink extra water and fill up on cool fruits that are really hydrating (watermelon, cantaloupe both great)

    Keep in mind that after a burn, your new layer of skin is much more sensitive. Make sure to be extra careful with yourself after you've been burnt, it's take a while for your skin to heal up. Sun exposure is very good for you, it's free, natural vitamin D. Make sure to get out and get sun everyday, just be smart and don't overexpose yourself. 

~ Janet ✌🌞

Monday, June 3, 2013

Coconut red lentils with cashews and spinach- vegan

    This weeks food Friday is a delicious vegan coconut red lentil dish with cashews and spinach. This is really good served with rice or naan. There are plenty of variations you can do, add tomatoes, meat, carrots, asparagus, even some avocado served on top would be nice. You can keep it mild or spice it up, whatever you prefer. Here's what you'll need:
    •1 small onion-diced
    •1 green onion-chopped
    •2 cloves garlic-chopped
    •2-3 tbs coconut oil
    •2 tsp curry powder
    •1/2 tsp mustard seed
    •1/2 tsp turmeric
    •1/2 tsp fennel seed 
    •salt, pepper, cayenne to taste
    •1 cup red lentils
    •1/2 red bell pepper
    •1 14 oz can coconut milk
    •juice of 1 lime
    •1 3/4 cups water
    •1/3 cup while cashews
    •1 cup fresh spinach-chopped
    •1/4 cup fresh cilantro-chopped  
    •sriracha (optional)
    First, in a large pot, sauté the onions (green and regular) and garlic in your coconut oil over medium heat for about 5 minutes. 


    Next add in your curry, mustard seed, turmeric, fennel, salt, pepper, cayenne and red lentils. Cook another 5 minutes stirring frequently so lentil don't stick. 

    Now add the coconut milk, water, bell pepper and lime juice. Bring to a boil, reduce heat to low, cover and simmer 20 minutes. Make sure to stir a few times to keep lentils from sticking. 

    Finally add in your cashews, spinach and cilantro. Stir them in and remove from heat. Let it sit for a few minutes so they spinach can wilt. Garnish with cilantro, cashews and sriracha. Serve over rice or with a piece of naan. It's delicious and hearty. 
    I hope you enjoy this!

~ Janet ✌